Tag: rpi

  • Raspberry Pi 3.5″ Display X11 Configuration

    Raspberry Pi 3.5″ Display X11 Configuration

    I got a really cute 3.5″ TFT display for my RPi from Cytron which has an ADS7846 touchscreen controller.

    After installing the drivers (by following the instructions here), I realised that the X/Y axes of the touchscreen were flipped.

    It took me a while to figure this out, so I’m writing a blog entry as a documentation.


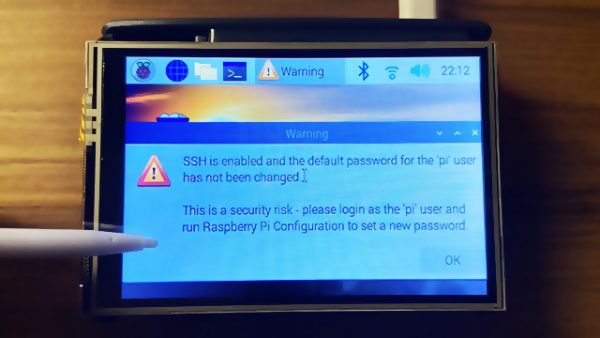
    SSH has been disabled by default on a fresh RPi OS installation. To use the RPi in headless mode with SSH enabled, create an empty file in /boot/ssh. This can be done via another computer, e.g. on my Mac:

    touch /Volumes/boot/ssh

    After the RPi boots, connect it to a LAN cable, SSH to it (find its IP address via DHCP server leases table) and then run raspi-config to do some initial configuration.

    raspi-config

    Now install the LCD drivers.

    To rotate the display so that the HDMI ports are on top. Edit /boot/config.txt:

    dtoverlay=tft35a:rotate=270

    Next, the touchscreen input will also have to be rotated accordingly. Edit /etc/X11/xorg.conf.d/99-calibration.conf:

    Section "InputClass"
      Identifier "calibration"
      MatchProduct "ADS7846 Touchscreen"
      Driver "evdev" # Force the evdev driver
      Option "Calibration" "3936 227 268 3880" # Default values
      Option "SwapAxes" "1" # Required for landscape orientation 
      Option "InvertX" "true" # Required for rotate=270
      Option "InvertY" "true" # Required for rotate=270
    EndSection

  • Raspberry Pi print server with no server-side driver

    Raspberry Pi print server with no server-side driver

    There are numerous articles which step through how to configure CUPS to turn an RPi into a print server but I bumped into a problem because there are no drivers available for my Brother MFC-7340 printer for ARM (only available for i386) and I was not keen work on the source code/compile/etc.

    The quick fix is to turn it into a RAW (a.k.a. HP JetDirect) print server.

    Install CUPS

    sudo apt-get install cups

    Configure CUPS

    Edit /etc/cups/cupsd.conf.

    Scroll down until you see the Listen configuration directive. Comment it out. This will make CUPS available over the network.

    # Only listen for connections from the local machine
    # Listen localhost:631
    Port 631

    Look for the <Location /> directive, and add Allow all (or a specific list of IPs, if your local network is not secure) to allow access.

    <Location />
      # Allow remote access...
      Order allow,deny
      Allow all
    </Location>
    

    Save the file and restart CUPS.

    sudo /etc/init.d/cups restart

    Configure Printer

    Now connect your printer to the USB port on the RPi.

    Now you should be able to use a browser and go to https://<ip.address.of.rpi>:631/admin to reach the CUPS web UI.

    1. Under Printers, click Add Printer.
    2. You should see your printer appear under Local Printers. Select it and click Continue.
    3. You can accept the default names on the next screen and click Continue.
      • You do not need to enable Share This Printer.
      • Make a note of the printer Name. You will need this later.
    4. In the next screen, click on Select Another Make/Manufacturer.
      • Select Raw and click Continue.
      • Select Raw Queue (en) and click Add Printer.

    Install xinetd

    sudo apt-get install xinetd

    Configure xinetd

    Edit /etc/services and scroll to the end. Add the following line:

    jetdirect 9100/tcp

    Create a new file /etc/xinetd.d/jetdirect and add the following, replacing Brother_MFC-7340 with your printer name configured in CUPS above.

    service jetdirect
    {
    socket_type = stream
    protocol = tcp
    wait = no
    user = root
    server = /usr/bin/lp
    server_args = -d Brother_MFC-7340 -o raw
    groups = yes
    disable = no
    }

    Save the file and restart xinetd.

    sudo /etc/init.d/xinetd restart

    Connect your computer

    Now, go to your computer and connect to the printer. These are steps for Macs.

    • Go to System PreferencesPrinters and Scanners.
    • Click on [+] to add a new printer.
    • Select IP
      • Address: <ip.address.of.rpi>
      • Protocol: HP JetDirect
      • Queue: <Blank>
      • Name: Enter a name of your choice here, e.g. Office Printer.
      • Use: Click Select Software and use the correct driver for your printer here.

    You should now be able to print to the new printer on your Mac.

    P.S. Sometimes you may need to connect your printer via USB to your Mac so that it installs the correct drivers first, then you can unplug the USB and select the drivers when configuring IP printers.